If you’re planning to replace a single tile or reuse floor tile in a new space, it’s important to know how to remove tiles without breaking them. Doing so carefully ensures that you keep the tile safe and don’t have to replace it. Let’s look at an easy and detailed guide to removing floor tile without damaging it.
Why should you remove floor tile without breaking it?

There are many reasons why you might need to remove floor tile without breaking it. You might want to:
- Replace a nearby broken tile without purchasing new tile.
- Reuse tile in another part of the room.
- Save unique or old tiles for a remodelling project.
Whatever your reason, treating tile carefully will save you time and money, while also helping to preserve the beauty of your space.
Tools You’ll Need
Before you begin, gather the following tools for successful tile removal:
- Utility knife or grout saw
- Putty knife or chisel
- Hammer or rubber mallet
- Painter’s tape or masking tape
- Heat gun or hair dryer
- Flathead screwdriver
- Pry bar
- Thin putty scraper
- Tile adhesive remover or acetone (optional)
how to remove tiles without breaking them

1. Cut the Grout Around the Tile
The first step in how to remove floor tiles without breaking them is to cut away the grout. Grout is the material that holds the tile in place, so you’ll need to remove it in order to loosen the tile.
- Use a utility knife or grout saw to cut along the edges of the tile, removing the grout. Be careful not to cut into the tile itself, as this could cause chips or cracks.
- Work slowly and methodically until all the grout is cleared from around the tile.
2. Apply Heat to Loosen the Adhesive
Applying heat is an effective way to soften the adhesive beneath the tile, making it easier to lift without breaking.
- Use a heat gun or hairdryer to apply heat to the tile for about 5-10 minutes. Move the heat source in circular motions to ensure even distribution.
- If you don’t have a heat gun, a hairdryer on its hottest setting can work too.
3. Insert a Putty Knife Under the Tile
Once the grout is removed and the adhesive has been heated, carefully insert a putty knife or chisel under the tile. Use gentle, steady pressure to start loosening the tile.
- Start at one corner and gently wiggle the putty knife or chisel under the tile. Work slowly, avoiding any jerky or sudden movements that could cause the tile to crack.
- You may need to switch to a thinner putty scraper if the adhesive is particularly strong.
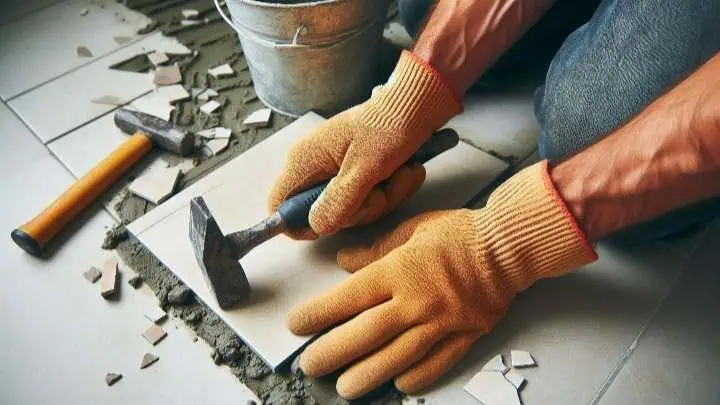
4. Tap Gently with a Hammer or Rubber Mallet
If the tile isn’t budging easily, lightly tap the handle of your putty knife or chisel with a hammer or rubber mallet to encourage the tile to lift.
- Be careful not to apply too much force, as this could crack the tile. A rubber mallet is a better option than a hammer to avoid breaking the tile.
- Keep working around the edges of the tile until it loosens completely from the floor.
5. Pry the Tile Off Slowly
Once you’ve loosened the tile, gently pry it off the floor using a flathead screwdriver or pry bar. Take your time and lift the tile evenly to avoid breaking it.
- If you feel resistance, stop and heat the area again before continuing. Pulling too hard can result in cracks.
6. Clean Off Adhesive from the Back of the Tile
After successfully removing the tile without breaking it, there may be some adhesive left on the back. Removing this adhesive is important if you plan to reuse the tile.
- Use a putty knife to scrape off the excess adhesive carefully. If the adhesive is stubborn, you can apply a small amount of tile adhesive remover or acetone to soften it before scraping.
- Make sure the tile is fully cleaned and smooth before storing or reinstalling it.
Tips for How To Remove A Tile Without Breaking It
- Patience is key: Removing the tile too quickly can cause cracks or chips. Work slowly and take your time.
- Use painter’s tape: Apply painter’s tape or masking tape to the surface of the tile before starting. This provides extra protection and prevents scratches.
- Heat carefully: Don’t overheat the tile, as excessive heat can damage certain types of tiles, like ceramic or porcelain.
- Check for hollow sounds: Before removing the tile, tap around its surface. If you hear a hollow sound, that means the adhesive underneath is weaker, making removal easier.
Learning how to remove a floor tile without breaking it is a delicate process but can be done with the right tools and patience. By carefully removing the grout, applying heat to loosen the adhesive, and gently prying the tile, you can successfully salvage your tile for future use. Whether you’re replacing a tile or reusing it for another project, following these steps ensures your tile stays intact, saving you both time and money.
How To Remove A Ceramic Tile Without Breaking It

Removing ceramic tile without breaking it requires careful handling and the right tools. Whether you’re reusing the tile for another project or simply replacing it, knowing how to remove a ceramic tile without breaking it can save you time and money.
Tools You’ll Need
- Grout saw or utility knife
- Hammer or rubber mallet
- Putty knife or chisel
- Heat gun or hairdryer
- Flathead screwdriver
- Painter’s tape or masking tape
- Tile adhesive remover or acetone (optional)
How To Remove Ceramic Tile Without Breaking It
1. Protect the Tile with Painter’s Tape
Start by applying painter’s tape or masking tape over the surface of the tile. This will help protect it from scratches or chips while you work on removing it.
2. Remove the Grout Around the Tile
Use a grout saw or utility knife to carefully cut away the grout surrounding the tile. Take your time to avoid damaging the tile edges. Removing the grout will make it easier to lift the tile.
3. Apply Heat to Soften the Adhesive
To make the tile easier to remove, apply heat to the area with a heat gun or hairdryer. This will help soften the adhesive under the tile.
- Apply heat for 5-10 minutes, moving the heat gun in circles to distribute the heat evenly.
4. Gently Insert a Putty Knife Under the Tile
Carefully slide a putty knife or chisel under the edge of the tile. Use gentle, slow movements to start loosening the tile from the adhesive. If it resists, apply more heat to the adhesive.
5. Tap Lightly with a Rubber Mallet
Once the putty knife is under the tile, lightly tap the handle with a rubber mallet to loosen the tile further. Be gentle to avoid cracking the tile.
6. Pry the Tile Off Slowly
After loosening the tile, carefully use a flathead screwdriver or pry bar to lift it. Do this slowly and evenly to prevent breaking the tile.
7. Remove Adhesive from the Back of the Tile
Once the tile is removed, use a putty knife to scrape off any adhesive stuck to the back. If the adhesive is hard to remove, apply a small amount of tile adhesive remover or acetone to soften it.
Read More Post:- How To Fix A Horizontal Crack In Basement Wall?
By following these steps, you can successfully learn how to remove tiles without breaking them With patience, the right tools, and careful handling, you will be able to preserve your tiles for reuse or replacement without damaging them.
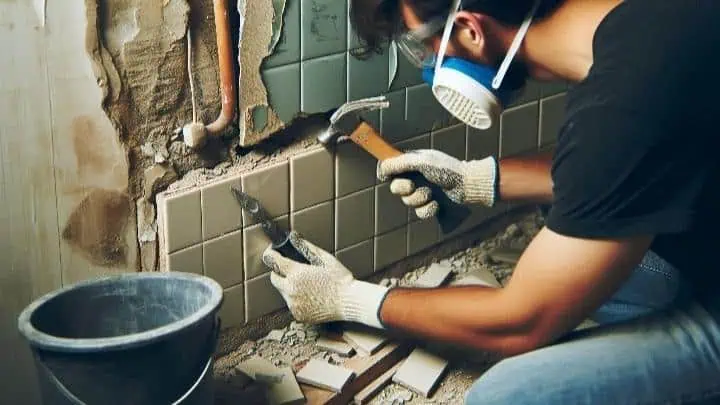
How To Remove Shower Tiles Without Breaking Them?
Removing shower tiles without breaking them requires patience, proper tools, and careful attention to detail. Here is a step-by-step guide to help you safely remove the tiles while minimizing damage:
Tools You’ll Need:
- Hammer and chisel or putty knife
- Grout removal tool (manual grout saw, oscillating multi-tool, or rotary tool)
- Utility knife
- Pry bar (optional)
- Protective equipment (goggles, gloves, and dust mask)
Step-by-Step Process:
- Protect the Area:
- Cover your shower drain with a cloth or tape to prevent debris from clogging it.
- Wear protective goggles, gloves, and a mask to guard against dust and tile shards.
- Remove the Grout:
- Use a grout removal tool to carefully remove the grout around the tile(s) you want to take out. Work slowly to avoid damaging the edges of the tiles.
- You can use an oscillating multi-tool with a grout removal blade or a manual grout saw for more control. Be sure to remove as much grout as possible to separate the tile from its neighbors.
- Loosen the Tile:
- Once the grout is removed, slide a putty knife or a thin, flat chisel behind the tile. Start at a corner or edge where it is easier to pry without force.
- Gently tap the handle of the tool with a hammer to wedge it further behind the tile. Work carefully and gradually around the tile’s edges to loosen it.
- Apply Gentle Pressure:
- Once the tile is loosened, gently pry it away from the wall using the putty knife or chisel. If you encounter resistance, avoid using excessive force that might break the tile. Instead, try loosening other areas around the tile to ensure it is fully detached.
- Use Heat (Optional):
- If the adhesive is stubborn, you can use a heat gun or a hairdryer to warm the adhesive behind the tile. Be careful not to overheat, as it can weaken the tile or burn nearby materials.
- Work Gradually:
- Continue to work around each tile carefully. Removing tiles one at a time is more time-consuming but helps ensure they come off without breaking.
- Clean Off Adhesive:
- Once the tile is removed, you can use a scraper to gently clean off any remaining adhesive or mortar from the tile’s back if you plan to reuse it.
Tips for Success:
- Go Slow: The process requires patience; rushing can lead to broken tiles.
- Choose the Right Tools: The right grout removal tool and a thin, flat chisel are key to reducing the risk of breakage.
- Test One Tile: Start with one tile to understand how much force is required and how it detaches from the wall.
With care and precision, you can remove shower tiles intact and reuse them for a different project.
FAQs:-
Can I reuse floor tiles after removing them?
Yes! If you follow the steps carefully and remove the tiles without breaking them, you can easily reuse them for repairs or in new projects.
Is it difficult to remove tiles without breaking them?
While it requires some patience and the right tools, it’s not overly difficult. The key is taking your time, especially during grout removal and prying the tile.
What should I do if the tile cracks during removal?
If the tile cracks, it may not be reusable. In such cases, you may need to purchase a replacement tile. Make sure to follow the process more carefully for the remaining tiles to avoid further damage.
How long does it take to remove a floor tile without breaking it?
On average, it can take about 20-30 minutes to remove a single tile, depending on the strength of the adhesive and the size of the tile.


1 thought on “How To Remove Tiles Without Breaking Them?”